Are Low-Voltage Electric Blankets Safe
Are Low-Voltage Electric Blankets Safe? Here’s The Shockingly Simple Truth Winter’s coming, and you’re relying on that electric blanket to survive – but is sleeping
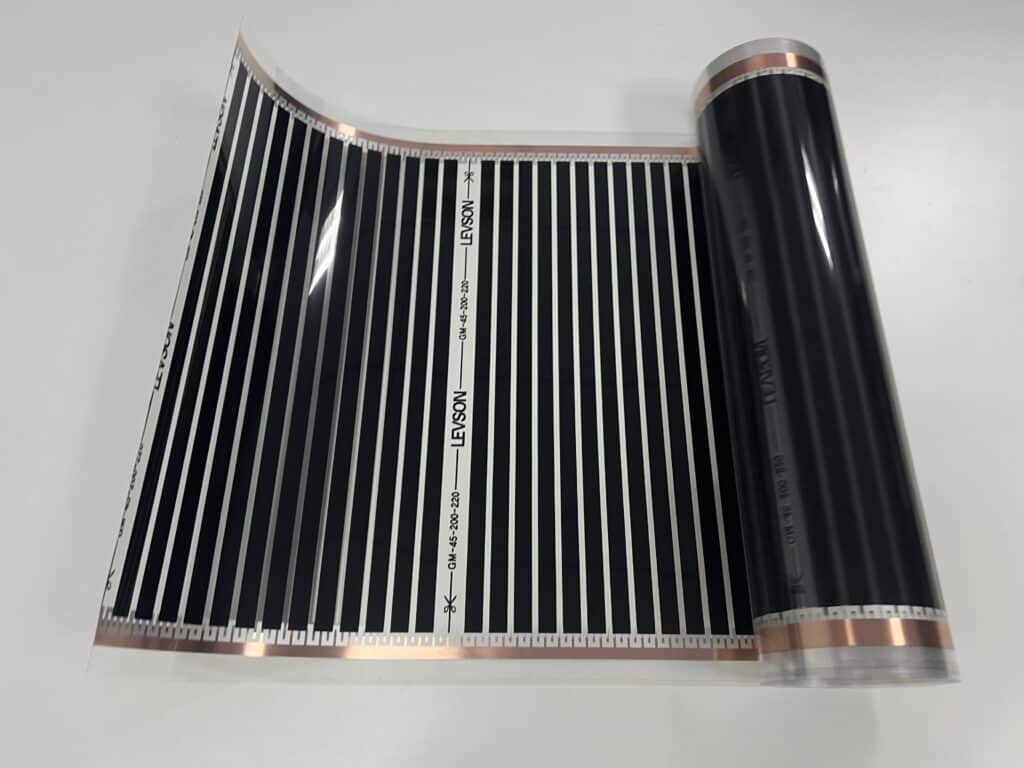
The heating film is also a kind of electric floor heating. It is also a new heating mode that uses electricity as energy and conducts heat through infrared radiation. It has the characteristics of fast heating speed, high heat dissipation coefficient, safety, energy conservation, and environmental protection. In this article, we will introduce the heating film installation tools, installation steps, and precautions for Heating film
Table of Contents
Toggle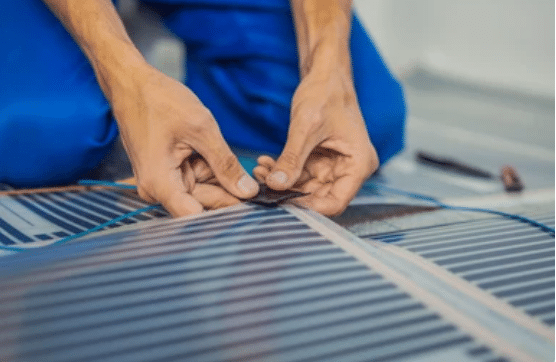
Preparing for the installation of heating film is essential to ensure a successful and safe process. Here are the steps you should take to prepare before installing heating film:
Select the appropriate heating film: Choose the type and size of heating film that is suitable for your specific application. Consider factors such as the room size, power requirements, and any manufacturer recommendations.
Read the manufacturer’s instructions: Before starting the installation, carefully read and understand the installation guidelines provided by the heating film manufacturer. Each product may have specific requirements that you need to follow for proper installation.
Prepare the surface: Ensure the surface where you plan to install the heating film is clean, dry, and free of any debris. If you are installing the film on the floor, make sure it is level and smooth. For certain types of heating film, you may need to apply a primer or adhesive promoter to improve adhesion.
Check the electrical supply: Verify that the electrical supply you are connecting the heating film to is suitable and meets the electrical requirements of the heating film. It’s crucial to have a dedicated circuit for the heating system.
Consider insulation: If you are installing the heating film on a floor, especially on concrete or in a basement, it’s beneficial to add insulation to reduce heat loss and improve the system’s efficiency.
Plan the layout: Decide on the layout of the heating film, considering the areas where you need the most heat. Avoid installing the film underneath heavy furniture or appliances that could damage the heating elements.
Check for compatibility: If you are installing the heating film under a new floor covering, make sure the chosen flooring material is compatible with the heating system. Some floor coverings, like thick carpets, may hinder heat transfer.
Test the electrical connections: Before proceeding with the installation, double-check the electrical connections and ensure that the electrical system is functioning correctly.
Gather the necessary tools and materials: As mentioned earlier, gather all the tools and materials required for the installation. Having everything ready beforehand will make the process smoother.
Safety precautions: Be aware of safety measures while working with electricity and heating elements. If you’re unsure about any aspect of the installation, consider consulting a professional electrician or heating system installer.
Allow the heating film to acclimate: If the heating film has been stored in cold conditions, allow it to acclimate to room temperature before installation. This can help prevent potential issues during installation.
Heating film installation typically involves the use of heating films or electric underfloor heating systems to provide warmth to a room or floor. The required tools and materials may vary depending on the specific type and brand of heating film you are using, as well as the surface you are installing it on. However, here is a general list of tools and materials that are commonly needed for heating film installation:
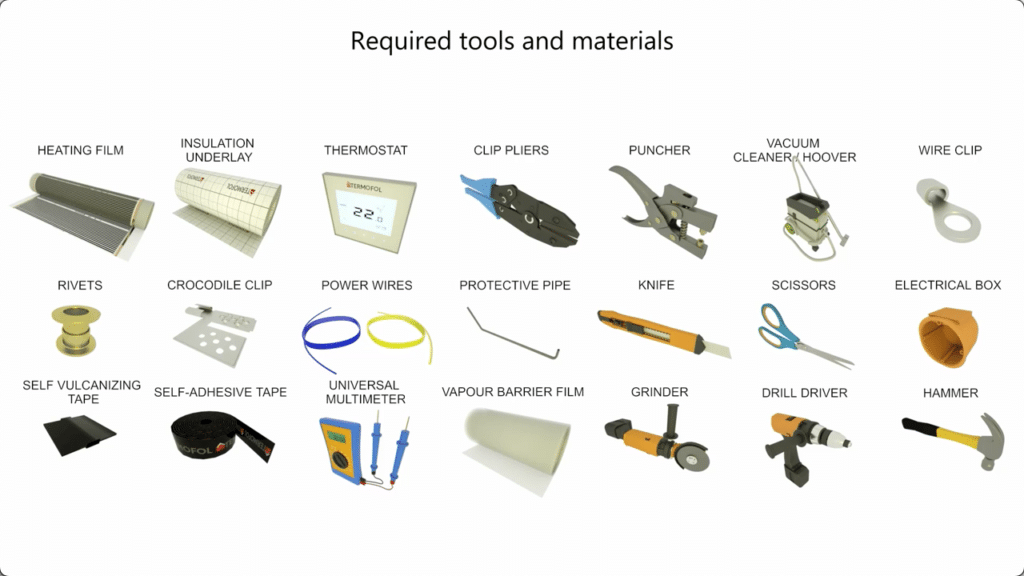
Please note that the specific requirements and guidelines for heating film installation can vary based on the manufacturer’s instructions and the type of heating film you are using. Always follow the manufacturer’s guidelines and consult a professional if you are unsure about the installation process. Additionally, ensure that any electrical work is carried out by a qualified electrician to guarantee safety and compliance with local regulations.
1. Laying insulation layer
Clean the ground thoroughly, and the installation design requires that the protective layer be fully laid. The insulation board should be cut neatly, and the joints should be firmly bonded to ensure no warping. The function of the insulation board is to prevent heat from being transmitted downwards.
2. Laying moisture-proof layer
When laying the moisture-proof layer, attention should be paid to overlapping. It should be fully laid, laid flat, and the overlapping should be firmly pasted with tape.
The Heating film shall be laid according to the position required by the design drawings, and the distance between the Heating film and the wall shall not be less than 30cm generally; Conduct the wire connection between the Heating film according to the requirements of the drawing. When laying, pay attention to avoid floor furniture. The Heating film should be kept flat and parallel. It is strictly prohibited to fold, drag and pull the Heating film and connect wires. It is strictly prohibited that sharp, hard, and sharp objects directly contact the surface of the Heating film. After the Heating film is laid, it shall be fixed with adhesive tape.
Install the low-temperature probe according to the installation position of the ground temperature probe shown on the design drawings. The ground temperature probe shall be installed at a place with uniform temperature, and the low temperature probe connecting line and Heating film power line shall be threaded into the PVC plastic conduit on the wall.
Clean the surface of the Heating film and the insulation layer, lay the protective film on the Heating film, completely cover the Heating film, and glue the edges and joints with adhesive tape. If a wooden floor is laid, a moisture-proof layer cannot be laid below the floor, resulting in the inability to transmit heat.
Before installing the temperature controller, it should be confirmed that the power distribution system is in a power-off state. According to the operating instructions of the temperature controller, connect the live line and zero line ends of the temperature controller with the live line and zero line of the power distribution system, connect the output end of the temperature controller with the live line of the Heating film, connect the low-temperature probe with the sensor of the temperature controller, install the temperature controller into a cassette in the wall, fix it firmly with bolts, power on and debug the temperature controller.
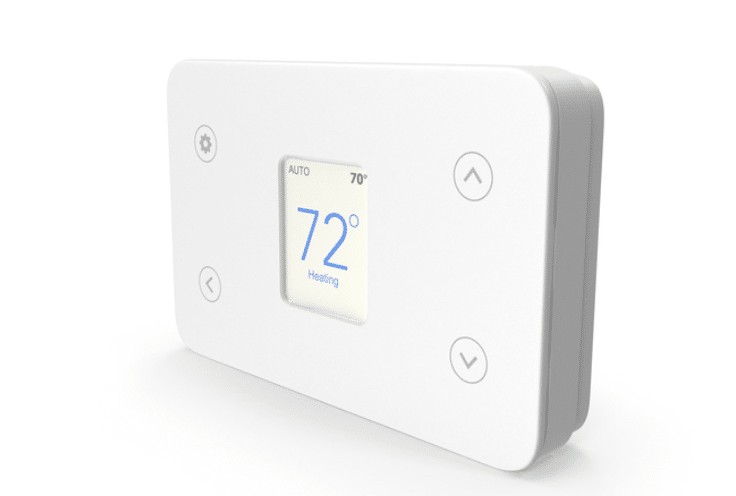
Check the power circuit entering the temperature controller, ensure that a leakage protection device is installed, power on and test according to the user manual, test relevant data, and ensure that the electric floor heating can operate normally.
1. It is forbidden to wear hard shoes during the the Heating film installation.
2. After the installation of the Heating film is completed, it shall be gradually heated 24 hours later to make the wooden floor gradually adapt to the temperature rise, so as to prevent the floor from distortion and deformation due to rapid heating.
3. Legless furniture and decoration shall not be installed on the Heating film heating system as far as possible to prevent local overheating and heat dissipation failure, resulting in damage to the floor and Underfloor heating.
4. During the power-on test run, the total resistance of the Heating film should be tested, compared with the design value, and recorded in detail. If there is any problem, it should be checked and maintained in time.
See the heating film pad installation video to help you understand clear
Are Low-Voltage Electric Blankets Safe? Here’s The Shockingly Simple Truth Winter’s coming, and you’re relying on that electric blanket to survive – but is sleeping
Winter’s back, and getting into bed feels like climbing into a freezer. As someone who’s always cold, an electric blanket is my survival tool. But
TL;DR: Y’all, heating tech just got a major glow-up. Graphene blankets aren’t just another product—they’re a total game-changer. We’re talking next-level warmth, wellness-based design, and
Traditional electric blankets can cause dryness and dehydration with prolonged use. Why do graphene electric heating blankets feel less dry and are more comfortable? You’ve
Experience the excellent energy-saving underfloor heating brought by new technology
We’ll get back to you in 1 business day.